BattlefieldsBattle of Abu Tellul
modern

Battle of Abu Tellul

1918
England
Era
modern
Battle Type
Pitched Battle
Location
England
Status
Unregistered
The Combatants

Who Fought

Combatant
and Empire
Strength
* *: 15th (Imperial Service) Cavalry Brigade; 1st Light Horse Brigade; B Battery, Honourable Artillery Company
VS
Combatant
Ottoman 24th Division (
Strength
supported by two German battalions)
Outcome
British Empire victory.
The Battle

History & Significance

The Battle of Abu Tellul (called the Affair of Abu Tellul by the British Battles Nomenclature Committee) was fought on 14 July 1918 during the Sinai and Palestine Campaign of World War I after German and Ottoman Empire forces attacked the British Empire garrison in the Jordan Valley. The valley had been occupied by the Egyptian Expeditionary Force (EEF) from February 1918 when Jericho was captured. Following two raids east of the River Jordan by the EEF the first in March and second in April the defence of the valley became the responsibility of the Desert Mounted Corps.

A German and Ottoman force attacked the Australian Light Horse units defending the heights at Mussallabeh and Abu Tellul on the edge of the Judean Hills, while a German force attacked those defending the Wadi Mellaha midway between Abu Tellul and the Jordan River. As these attacks were taking place on the western bank of the river, on the eastern side the Ottoman Caucasus Cavalry Brigade deployed two regiments, to attack the bridgeheads at the fords of El Hinu and Makhadet Hijla. However, the Ottoman formation was overwhelmed by a combined force of British and Indian troops before it could launch its attack. These were the last attacks against the British forces in this campaign.

Abu Tellul was a strategically important ridge located near the west bank of the Jordan river which, together with another ridge to the north called Mussallabeh, formed a salient in the British defensive line in the Jordan valley. A number of defensive posts were constructed by the Australian and New Zealand garrison which were often between 400 yards (370 m) and 1,000 yards (910 m) apart, consisting of either dug or built up stone sangars, while the ravines in between were covered with barbed wire. The British artillery batteries were concealed close behind the front line just south of the ridge.

El Mussallabeh had been attacked on 11 April, between the first and second Transjordan raids. The attack had been launched by a composite force of four Ottoman infantry battalions and several batteries. Subsequently, defensive work was carried out. From early May, when the withdrawal of the forces involved in the second Transjordan attack was complete, the occupation of the Jordan Valley by the Egyptian Expeditionary Force was unchallenged, except for the attacks on 14 July and shelling by long-range Ottoman and German artillery.

The Ottoman and German attack occurred on the front line protecting the garrison in the valley; the main focus being a salient in the wilderness to the north north west of the Wadi el Auja on the western side of the Jordan River. They sought to cut off the British force in the Jordan Valley from the infantry holding the front line in the Judean Hills by creating a wedge between the infantry and the mounted force in the valley. Such an action would, if successful, have destabilised British control of the Jordan and Dead Sea area, effectively ending the threat of a third Transjordan attack by pushing Lieutenant General Harry Chauvel's forces back out of the Jordan Valley. If the attack succeeded, the front line stretching from the Mediterranean Sea would have been considerably shortened and potentially destabilised. The Ottoman Eighth Army defending the coastal sector, the Seventh Army defending the Judean Hills and the Fourth Army defending the east would have been able to strengthen their considerably shorter line to threaten General Edmund Allenby's right flank making the attacks in September at Megiddo very difficult, if not virtually impossible.

The ground

The ground they fought on

The site of Battle of Abu Tellul lies on White Chalk Subgroup, bedrock that formed in the Maastrichtian. The rock here is chalk.

Casualties & Losses
  • and Empire: * *: 189 including 23 killed, 46 wounded Australian Light Horsemen
  • About 1,000; 105 killed, 45 wounded, 425–540 captured
Questions & Answers

Frequently Asked Questions

Unlimited access

Everything a full report reveals about Battle of Abu Tellul

This page covers Battle of Abu Tellul. A full Aubrey report for the area pulls together this battle alongside scheduled monuments and everything else the record holds within a few miles:

Overview
An interactive map of the location with every monument and battle plotted, and a plain-language history built only from what the record holds.
Monuments
The legally protected scheduled monuments around the location, each with its period, type and significance.
Battlefields
The battles and sieges fought on this ground, mapped and set on a timeline of the wider conflict.
Roman Britain
The Roman roads, forts and towns near here, and the Iron Age people who held the land before Rome arrived.
Domesday
The settlement's entry in the 1086 Domesday Book: who held it, what it was worth, and the people who worked the land.
Civil War
The Civil War fighting, garrisons and recorded militaria in this area, woven into the arc of 1642 to 1651.
Geology
The bedrock beneath the site, its age and rock type, reaching back hundreds of millions of years.
LiDAR
Laser-scanned terrain that reveals earthworks hidden under fields and woodland, with likely features flagged.
Local Names
What the street and field names around here actually mean, and the history buried inside them.
Historical Maps
Ordnance Survey maps from the 1800s, layered over the location as it stands today.
Literature
The books, county histories, charters and archives that mention this place, quoted with their sources.
Legal
The protected sites nearby and the metal-detecting, access and treasure laws that apply to this ground.
Spotlight
A deep dive into the most remarkable, lesser-known history of the place, traced back to the record.
Target Zones
For detectorists: the most promising ground to search nearby, ranked by confidence, with what to expect.
Timeline
The whole story of the location told era by era, from prehistory to the present day.
First month just £4.99, then £9.99 a month. Unlimited locations, cancel anytime.

Every location is different. Not every section appears for every place, only what the historical record actually holds turns up in a report.

Start your Battle of Abu Tellul report
Or see a real report first
Protected heritage nearby

Scheduled Monuments near Battle of Abu Tellul

Quarley Hill camp
Quarley Hill camp
Scheduled monument · ~1.1 mi

Quarley Hill camp is an Iron Age hillfort situated near Andover in Hampshire, England. The monument consists of a roughly oval enclosure defined by a substantial bank and ditch system that would have served both defensive and demarcating purposes. Dating to the Iron Age period, the site represent…

Boyes-Hannington / CC BY-SA 2.0 / Wikimedia Commons
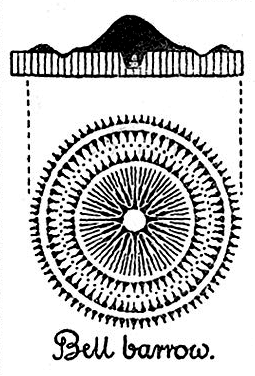
Bell barrow, three bowl barrows and gas testing trenches on Idmiston Down
Scheduled monument · ~3.5 mi

Bell barrow, three bowl barrows and gas testing trenches on Idmiston Down is a Bronze Age burial monument located in Wiltshire, comprising a bell barrow accompanied by three smaller bowl barrows. The bell barrow, the principal earthwork, is distinguished by its characteristic bell-shaped mound su…

Danebury Hill camp
Danebury Hill camp
Scheduled monument · ~4.3 mi

Danebury Hill camp is an Iron Age hillfort located near Nether Wallop in Hampshire, England. The site comprises a substantial single bank and ditch enclosure crowning the hilltop, enclosing an area of approximately 5.3 hectares, and dates to the Middle Iron Age, with occupation evidence spanning…

Hampshire Hub and University of Southampton / OGL v1.0 / Wikimedia Commons
Bowl barrow 400m south of Waters Down Farm
Scheduled monument · ~4.9 mi

Bowl barrow 400m south of Waters Down Farm is a Bronze Age burial monument located in Hampshire. The barrow survives as a round mound characteristic of bowl barrow form, a common funerary structure of the Bronze Age period. Such monuments typically contained inhumation or cremation burials, often…

Dave.Dunford / CC BY-SA 4.0 / Wikimedia Commons
Long barrow, Winterbourne
Scheduled monument · ~5.5 mi

Long Barrow, Winterbourne is a Neolithic burial monument located in Wiltshire. The barrow dates to the early Neolithic period and represents the type of communal burial structure characteristic of the fourth millennium before the Common Era. The monument survives as an earthwork and is identified…

Figsbury Ring
Figsbury Ring
Scheduled monument · ~6.2 mi

Figsbury Ring is a hillfort located near Salisbury in Wiltshire, dating to the Iron Age. The monument consists of a roughly circular enclosure defined by a single substantial bank and ditch, which encloses an area of approximately 11 acres on the summit of a chalk downland ridge. Excavations and…

Jim Champion / CC BY-SA 2.0 / Wikimedia Commons
Bowl barrow 125m north-east of South View Farm
Scheduled monument · ~0.3 miles
Bowl barrow 780m NNE of Hampshire Gap
Scheduled monument · ~1.1 miles
Aubrey Research

Explore the landscape around this battlefield

Aubrey generates in-depth historical research for any location in the UK — drawing on Domesday records, scheduled monuments, Victorian OS maps, geological data and archaeological archives to tell the full story of a place.

Research a location near this battlefieldView a sample report
Sources